Todo list with Lenra views
Now that you know the basics of a Lenra app, we can create our first app : a basic TODO List.
Note : To follow this guide, you must have basic knowledge about JavaScript and Mongo query language (see Data management). To make it understandable for everyone, we will not use the components library and only describe the views in JSON, but we will use the app library since we have one for the languages managed by our templates.
First of all, we want to organize our model (database).
We will have only one collection : the task collection that will store all of our tasks.
A task item will contain 4 properties :
- The ID of the document. This id is auto-generated, you don’t have to care about this.
- The description of the task to be done
- A boolean to save the done status
- A reference to the current user to help us to only get the user todo.
Our document will look like that :
{
    "_id": "ObjectId(634d692fcbd9f6704818309c)",
    "description": "Code my first app with Lenra",
    "done": false,
    "user": "a ref to the user"
}
Create the model class
Now that we know what a task looks like, we want to create it in our app. To do that, we will create a new file in the classes directory : Task.js
import { Data } from "@lenra/app-server";

export class Task extends Data {
  /**
   * @param {string} description The description of the task to be done
   * @param {boolean} done The done status
   * @param {string} user The task owner
   */
  constructor(description, done, user) {
    super();
    this.description = description;
    this.done = done;
    this.user = user;
  }
}
Note that the _id field does not have to be managed since this class extends the Data class from the app library. This class is a simple class that allows us to easily create a class that represents a document in our database.
Create a new task
We now want to create a new view to let the user create tasks. To do that, we will create a new file in the views directory : addTaskForm.js
In the addTaskForm.js view, we create a new function (and export it). In this function, we will first add a form component.
export default function(data, props) {
  return {
    _type: "form",
    onSubmit: {
      _type: "listener",
      name: "submitTask"
    },
    child: {...}
  }
}
In this view, we define the onSubmit listener. This tells the UI to submit the submitTask listener when the form is submitted.
Then we will declare the inputs in our form.
export default function(data, props) {
  return {
    _type: "form",
    onSubmit: {
      _type: "listener",
      name: "submitTask"
    },
    child:
    // 1 - Flex component
    {
      _type: "flex",
      crossAxisAlignment: "center",
      spacing: 2,
      children: [
        // 2 - label
        {
          _type: "text",
          value: "Your task : "
        },
        // 3 - The textfield to type the description
        {
          _type: "flexible",
          child: {
            _type: "textfield",
            value: "",
            name: "description"
          }
        },
        // 4 - The button to submit the form
        {
          _type: "button",
          text: "Add",
          submit: true,
        }
      ]
    }
  }
}
Let's see what happens here :
1 : The Flex component
The form allows only one child. The reason is simple, it does not infer how you want to place your inputs in the form. That is why we add a Flex component that describes how the children will be placed in the UI.
By default, the flex is horizontal. We add the crossAxisAlignment: "center" to vertically center the children and a spacing: 2 to add some spaces between the children.
2 : The label
This one simply adds a label before the textfield. That’s it !
3 : Textfield
This is a two in one.
The textfield component simply adds a textfield with a default value to empty (value: “”). The name: “description” connects this textfield first form up in the component tree. This way, when the form will be submitted, the event will contain a description field that contains the value of the textfield :
{
    "value": {
        "description": "valueOfTheTextfield"
    }
}
Then we have the flexible component. that allows the textfield to take all the remaining space in the flex above. As simple as that !
4 : The submit button
This component is a simple button in which we add the submit: true property. This connects the form to this button. This way, when the button is pressed, the form will be automatically submitted (the onSubmit listener will be called).
Call the form
Now that our form is ready, we just have to call it in our main.js component using the view component.
export default function(data, props) {
  return {
    _type: "flex",
    direction: "vertical",
    crossAxisAlignment: "center",
    padding: {
      top: 16,
      bottom: 16,
      left: 32,
      right: 32
    },
    spacing: 8,
    children: [
      {
        _type: "text",
        value: "Lenra Todo List",
        style: {
          fontWeight: "w800",
          fontSize: 22
        }
      },
      {
        _type: "view",
        name: "addTaskForm",
      }
    ]
  }
}
Now you can start your app in your terminal using
lenra dev
Then open your browser at http://localhost:4000
Your app should look like that. 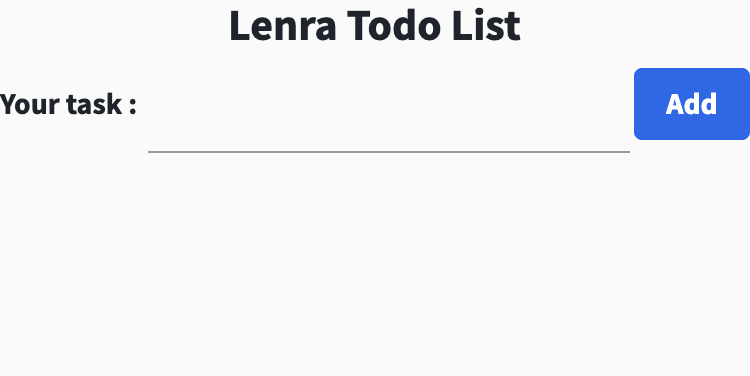 You should be able to type some text in the textfield. But for now the “add” button does nothing. Let's change that !
Create the submitTask listener
We will now create the listener that will react to the “add” button pressed.
Remember the name: "submitTask" property in the form onSubmit listener ? That’s the name of our listener. So create a submitTask.js file in the listeners directory and add this code to it :
// 1 - import our Task model class
import { Task } from "../classes/Task.js";

/**
 * @param {import("@lenra/app-server").props} _props The listener props
 * @param {import("@lenra/app-server").event} event The event
 * @param {import("@lenra/app-server").Api} api The Lenra API interface
 * @returns
 */
// 2 - create the listener function with "props", "event" and "api" arguments
export default function (_props, event, api) {
  // 3 - Call the API to create a new task document.
  return api.data.createDoc(
    new Task(event.value.description, false, "@me")
  );
}
1 : Import the Task model class
We will use the Task class to create a new task document in our database by creating a new instance of it and give it to the createDoc method.
2 : Create the function
A listener function takes 3 parameters : props, event and api.
- The props will be ignored here.
- The event contains the data from all the form inputs (our
description). - The
apiis an object that is used to call the Lenra API as the current user. It contains a data sub object that allows us to call the Data API.
In this function body we can call our Data API to create our new task.
Keep in mind that the listener must execute relatively fast in order to avoid long loader. (less than a second ideally).
3 : Create our task
This is where the magic starts. The api.data.createDoc function will create a new document in the task collection.
Remember our database model. The user field should contain the current user ID to be able to filter the task that belongs to the user. To do this, Lenra offers a shortcut to access contextual data. In our example @me is a reference to the current user ID and will be replaced automatically.
When the document is added, the UI will be rebuilt in order to instantly display the updated interface to the user.
You can restart the app by pressing the R key, refresh your browser and you should be able to create a new task now !
But wait… The task is still not visible yet.
List the user tasks
Now that we can add new tasks in our database, let's list them in the interface.
To do this, create a new taskList.js view that gets the tasks ids in the data parameter.
import { DataApi } from "@lenra/app-server"
import { Task } from "../classes/Task.js"

export default function (data, _props) {
  return {
    _type: "flexible",
    child: {
      _type: "flex",
      direction: "vertical",
      scroll: true,
      children: taskList(data),
    }
  }
}

function taskList(tasks) {
  if (tasks == undefined || tasks.length <= 0) {
    return [{
      _type: "text",
      value: "No tasks"
    }]
  }

  return tasks.map(task => {
    return {
      _type: "view",
      name: "taskCard",
      find: {
        coll: DataApi.collectionName(Task),
        query: task
      }
    }
  })
}
As you can see, we use the same view component that we used to call the addTaskForm view. The only difference is the find property. This property is used to query the database and get the data we need to display.
The coll property defines the collection where we want to run the query.
Then the query is a simple mongo query with some adaptation due to our realtime update system (see the Data management limitations). This query will filter the task collection to give us only the task corresponding to the task _id. The result of this query is the data argument in our view function.
I’m sure you will be able to create the taskCard view by yourself ! If you have some trouble, you can find the code below.
/**
 * @param {import("../classes/Task.js").Task[]} param0 The task query result
 * @param {import("@lenra/app-server").props} _props
 * @returns
 */
export default function ([task], _props) {
  return {
    _type: "actionable",
    onPressed: {
      _type: "listener",
      name: "toggleTask",
      props: {
        task: task._id,
      }
    },
    child: {
      _type: "container",
      padding: {
        bottom: 2,
        left: 5,
        right: 5,
        top: 2,
      },
      border: {
        bottom: {}
      },
      child: {
        _type: "flex",
        spacing: 2,
        fillParent: true,
        crossAxisAlignment: "center",
        mainAxisAlignment: "spaceBetween",
        children: [
          {
            _type: "flexible",
            child: {
              _type: "text",
              value: task.description,
              style: {
                decoration: task.done ? "lineThrough" : "none",
              }
            }
          }, {
            _type: "actionable",
            onPressed: {
              _type: "listener",
              name: "deleteTask",
              props: {
                task: task._id,
              }
            },
            child: {
              _type: "icon",
              value: "delete",
              color: 0xFFFF0000
            }
          }]
      }
    }
  }
}
Now we want to call our taskList with some data in it. To do this, go to the main.js view.
import { DataApi } from "@lenra/app-server";
import { Task } from "../classes/Task.js";

export default function (data, props) {
  return {
    _type: "flex",
    direction: "vertical",
    crossAxisAlignment: "center",
    padding: {
      top: 16,
      bottom: 16,
      left: 32,
      right: 32
    },
    spacing: 8,
    children: [
      {
        _type: "text",
        value: "Lenra Todo List",
        style: {
          fontWeight: "w800",
          fontSize: 22
        }
      },
      // Call the taskList view with some data.
      {
        _type: "view",
        name: "taskList",
        find: {
          coll: DataApi.collectionName(Task),
          query: {
            "user": "@me"
          },
          // We only need the _id field to display the task list.
          projection: { "_id": true }
        }
      },
      {
        _type: "view",
        name: "addTaskForm",
      }
    ]
  }
}
To reduce data load and avoid unchanged view rebuild, we can use the projection property to only get the _id field of the task.
And we’re done ! Restart the Lenra CLI (lenra dev). The task list should now be visible !
Add some features
We now have a simple list. But a todo list is more than just a list !
With your new knowledge, you should be able to create the next features.
Delete a task
Add a button to delete the task next to it. When the user clicks this button, remove the task from the database.
You will need :
- Update the
TaskCardto add the delete button - Add a new listener to delete the task using the
api.data.deleteDoc()function
Toggle the tasks
When the user clicks on a task, toggle thedone boolean. Then in the TaskCard, depending of this boolean, cross the description of the task.
You will need :
- Update the
TaskCardto add an Actionable component - Add a new listener to toggle the task using the
api.data.updateDoc()function. - Add a textStyle property to the text description component.